I can’t cook. Like ... at all. If it wasn’t for my live-in chef (aka my boyfriend, who took up cooking as a quarantine hobby) my diet would pretty much consist of cereal, toast, quesadillas and a whole lot of takeout.
And baking? Never heard of her. If I can’t even make myself three basic meals a day, why would I even bother trekking down a path of nonessential, sweet treats?
The answer: 2020. Though I didn’t hop on the quarantine baking trend back in March, I did develop a year-long obsession with TikTok while stuck at home. And last month, the app is where I came across the trending “Sprite Pie” made by @kitchentool. The intriguing pie recipe sparked a crazy idea: to use my kitchen. ‘Tis the damn season, after all.
While researching how to make this delicacy, I learned that Sprite Pie is (very likely) an adaptation of Water Pie: a dish from the Great Depression, created out of necessity due to scarce resources. Since the two pies have nearly identical ingredients, that led to an intriguing shower thought the morning of my scheduled pie bake — what if I swapped Sprite for something else? Say ... hard kombucha?
As soon as the idea came to me, I knew I had to commit. And since I was going rogue anyway, I decided to skip the drive to the supermarket and challenge myself to only use ingredients and supplies available at my local grocery store/beer shop downstairs from my apartment.
The small store had the basics: flour, sugar, butter, salt and — of course — hard kombucha. But it didn’t supply the final ingredient: a frozen pie crust. So, like the expert baker I am, I decided to make one from scratch. Easy as pie, right? (I promise that’s the only pie pun in this article.)

Ingredients for my homemade “Hard Kombucha Pie”
(Sara Butler)
Miraculously, I found a simple pie crust recipe on YouTube that only used four ingredients. Yet as glorious of a tool as the internet is, it couldn’t give me the physical tools missing from my kitchen, like a wooden rolling pin or a pie plate. And neither did the shop downstairs. Whoops.
But nevertheless, I persisted. Once the ball of dough was ready to flatten, I went on the hunt for a rolling pin dupe. I evaluated my cupboards and gathered up all my cylinders: from glasses to Hydro Flasks to NutriBullet cups. In the end, I settled on a metal water bottle.
Replicating the pie tin — where the flattened dough is placed before baking — proved to be a harder hack. Since it had to be oven safe, my container options were limited. But among the ceramic plates and plastic platters in my kitchen, I found one glass bowl that looked durable enough to survive the heat. And though the large bowl was a little too tall to form the traditional pie shape, beggars can’t be choosers. (Confession: I had to Google if I could put glass in the oven. After my search, I still wasn’t entirely sure if my unlabeled bowl was oven-safe, but decided to risk it.)
I followed this eight minute tutorial from Frugal Family Home, which was super straightforward and easy to follow. Simply mix the ingredients, add water to create a moist ball of dough, then flatten it out with a flour-covered rolling pin (or in my case, a water bottle, which worked surprisingly well).
However, once you place the pie crust in the tin, the video ends without further instruction. Was I supposed to freeze it? Bake it? Refrigerate it? Throw it out the window?
After frantic-Slacking my editor and scouring online articles, I still couldn’t find my answer ... until I looked at the first pinned comment under the video, in which the YouTuber offers some (vague) post-plate instruction. For baked pie shells, she suggested baking the crust for eight to 10 minutes before adding filling.
While I appreciated the direction, I still didn’t know if a frozen pie crust dupe needed to be baked — and once again, the internet proved to be no help — but it seemed like the right next step? So I baked it for double the amount of time (after the initial 10 minutes, the pie didn’t look any different), let it cool, then bam! A golden pie crust!
With my baked pie crust ready, it was time for the main attraction. I poured in my can of hard kombucha, sprinkled in the sugar and flour mix, skipped the vanilla extract, and threw the butter pieces on top. Then, I added foil to the top to create a pie shield (seen in the video, and explained here), though it was a little wonky considering the shape of my makeshift pie tin.
After baking for an hour, I took it out and it looked ... almost like the TikTok version? To be honest, I was feeling pretty smug and eager to sneak a taste. But before truly comparing, I had to chill out and let the pie cool.
The TikTok recipe doesn’t specify how long the pie should cool before serving, so I opted for 15 minutes on the counter, followed by 30 in the fridge and 15 in the freezer. An hour should be more than safe, right?
But when I checked on the pie’s progress, it didn’t look like anything had changed. Why was it still soupy? Shouldn’t it be condensed by now? Where was that jelly-like consistency? Are these even accurate baking terms?
When I asked for a second opinion, my sous chef/boyfriend encouraged me to put the pie back in the oven. After an hour with constant checking, I pulled it out to reveal a slightly less watery interior ... but my golden crust was now two shades darker. Not wanting to damage my beloved exterior any further, I turned off the oven (for good this time) and started the cooling process once again; this time, I left it in the fridge overnight.
The next day it was finally time to consume my laborious creation. As I cut into the pie, it was clear I overcooked the crust, as it was a bit too hard for the knife ... causing it to crack and separate from the filling. With a little effort, I managed to scoop out a decent looking slice.
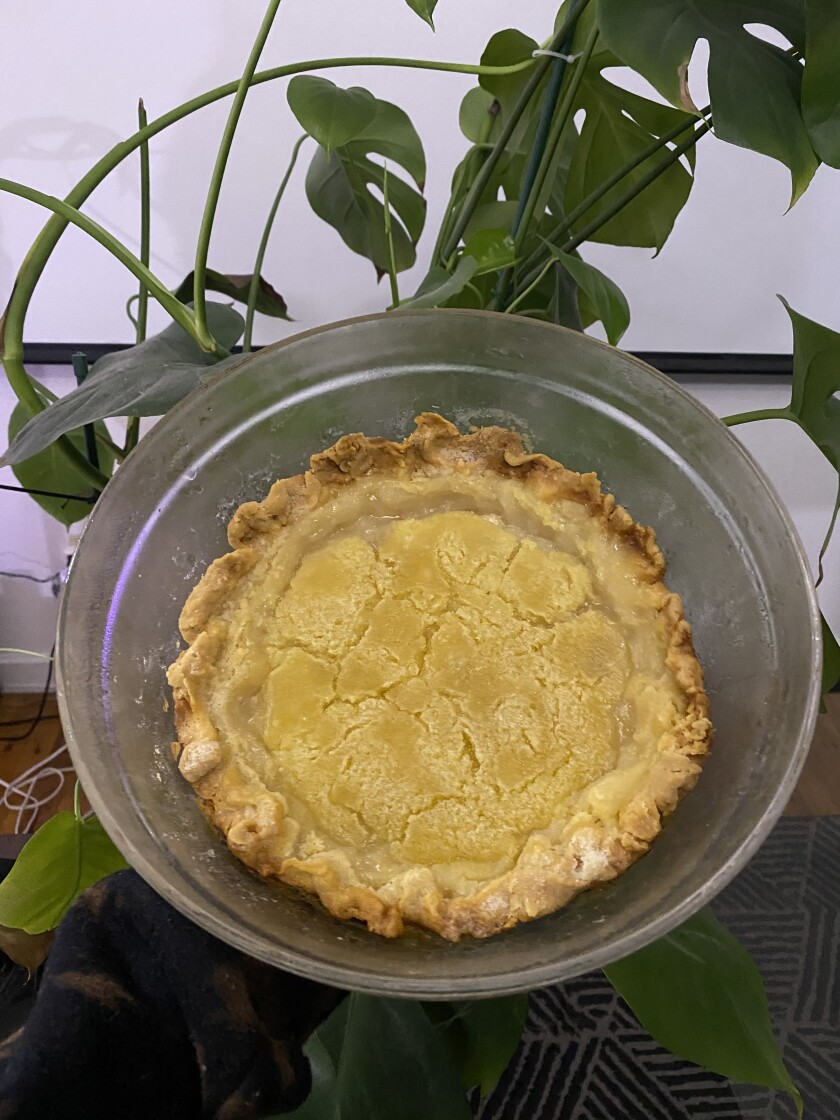
The final version of the pie, after baking and cooling twice
(Connor McBride)
The filling was still slightly soupy, but solid enough to chew. Despite the amount of sugar in the recipe, it was far more tart than sweet — and since the general consensus of “Sprite Pie” reviews was how sweet it was, I’m 90 percent sure the tart flavor came from the hard kombucha. And the filling very much tasted like hard kombucha, with an alcohol-forward flavor that’s hard to articulate.
So ... was it worth it? Undecided. Though I did surprise myself by having the confidence to experiment with the recipe — including substituting the recipe’s main ingredient — it would probably have tasted better if I had stuck to the instructions, written by folks who have spent more than just one day in their kitchen.

A sliver of the mess in my kitchen from the baking process
(Sara Butler)
And considering the amount of anxiety I felt during the entire process, not to mention the massive mess I left in the kitchen, I don’t feel inspired to tackle another pastry endeavor anytime soon. (I’m still baffled baking is a stress-reliver for so many people.)
I’ll leave you with a review of the novel “Hard Kombucha Pie” from a seasoned chef (my boyfriend): “It’s really not that bad.” In my beginner’s cookbook, I’d say that’s a modest success.
The Link LonkDecember 31, 2020 at 01:36PM
https://ift.tt/2KIj4V4
I Tried: Baking "Sprite Pie" ... with hard kombucha - pacificsandiego.com
https://ift.tt/2CPpHAw
Pie


Izin ya admin..:)
ReplyDeleteHanya Ada di DEWALOTTO semua bisa jadi jutawan jadi tunggu apa lagi yukkk...
ADD WA +855 888765575Terima Kasih admint...:)