Rechercher dans ce blog

Wednesday, July 1, 2020

I like pies but not cherry pie - Westside Eagle Observer

arome.indah.link

I enjoy the grands, and that's a fact, but the most fun is taking them all to the ice cream store and sitting in the big round table and watching and talking as we all eat our chosen flavors! We can't fit properly in my close relative's auto so it takes a caravan of autos to get us there.

Mind you, I am not griping, but I remember taking the little herd of precious children and not one parent, other grandparent, girlfriend, boyfriend or dog would go along! I had them all to myself, smears of ice cream and all! It was a wonderful time for all of us with the attention directed on the interaction of the brothers and sisters with me. I was not aware that the time would arrive when it would still be in the same seat with the same kids but so very different. Time moves along and I lament loud and long but only to my close relative!

The welcomed rains and plentiful mud brought us another time of good harvesting of hay. The storage barns are filling and the first cutting is done. I will not build more barns, we will store outside and it will be not as good as protected hay but still good. Here I am, counting my chicks before they hatch again, but I pray for no armyworms, hot dry weather that bakes the grass into straw and other disasters that we know could happen.

We had a long talk about buying the place next to us that we have leased for years. The offspring feel we are about to lose it due to it being up for sale and they would like to put Bermuda on it. A good 40 acres that are flat and treeless except for the fence lines. We have used it for 12 years and it is in good shape but do you struggle to believe the price of land as I do? And we will have to make a decision quickly because it is such a good place and folks are buying anything they can in the country.

Raising the family in the country is a great idea for the working family. It isn't a long way to town, considering the road is paved and easy to navigate. I have seen this several times before -- never seen one work out well -- and yet people want to raise kids in the country. I will explain what I mean. Kids of working parents usually stay indoors when they get home from school or the babysitters so they can be with their parents. Then, as they grow, the teens are busy with school activities, dating and, if home, are playing video games. But the urge goes on and that 40 acres will sell in a hurry. I suspect I will have to visit the man at the bank again soon.

The cattle are belly deep in grass but it is hot and we need rain. I am still loving summer but I realize how many past summers I have seen! Seems like my steps are slower and therefore I try to saddle a horse instead of walking when possible. Did you realize you can boss while sitting tall in the saddle? I believe it is even more impressive!

It is my opinion, and everyone has one, many fruits make wonderful pies. Peaches, blackberries, apples and sometimes cream pies full of pineapple or bananas are just the grandest sort of eating. I am easy to please, but I do have one or two favorites and one I do not like. I do not like cherry pie! There I said it and you can believe it! I hope I never see another cherry pie on our table again!

So that is my opinion and it is in writing, but if you have any kind of compassion for your fellow man you will not tell my close relative I said that! It will stir up a storm because she likes to make cherry pies for church dinners as some fellers continually brag on them and beg for more! Just keep it to yourself and spare me the pain!

Bill is the pen name used by the Gravette area author of this weekly column. Opinions expressed are those of the author.

The Link Lonk


July 01, 2020 at 04:11PM
https://ift.tt/2AjPVds

I like pies but not cherry pie - Westside Eagle Observer

https://ift.tt/2CPpHAw
Pie

Bake a pie for the Fourth of July - STLtoday.com

arome.indah.link
Subscribe for $5 for 5 months

Celebrating the Fourth of July? That's as American as apple pie.

So why not celebrate it with an apple pie? It is the quintessential American dessert — it goes along, as the commercial used to say, with baseball, hot dogs and Chevrolet.

Except, as with a lot of American foods, it did not originate in America. In England, in fact, they say something is "as British as apple pie," and they have a better claim to the boast. The first known recipe for apple pie was English and dates back to 1381.

"Tak gode Applys and gode Spycis and Figys and reyfons and Perys and wan they are wel ybrayed colourd wyth Safron wel and do yt in a cofyn and do ye forth to bake wel," it said.

If I may put the class I took on Chaucer to good use for the first time ever, I'll attempt a translation: Take good apples and good spices and figs and raisins and pears, and when they are well chopped and colored with saffron, put it in a double pie crust and bake well.

So apple pies are British. Fine. Wasn't that why we fought the American Revolution? To escape the tyranny of King George III, for representation in government and for the right to claim apple pie as our own?

So if you're feeling patriotic this Independence Day, celebrate with an apple pie. And if apple pie is not to your taste, you can always be a little showier about your patriotism with a stunning American Flag Pie.

An American Flag Pie is a delicious representation of the American flag, with a field of blueberries or blackberries, red stripes of strawberries and white stripes and stars made of crust.

With any pie, the crust is the thing. For my Fourth of July pies — apple and flag — I wanted to make the best crust I possibly could.

Perfect Pie Crust

Yield: 2 (10-inch) crusts. 16 servings for two crusts, 8 servings for a double crust

Making the best crust means using the best fat. Butter gives you best flavor. Vegetable shortening makes it tender and flaky, and lard makes it even more tender and more flaky — but lard is rendered pig fat and the very thought of rendered pig fat in pie crust strikes me as a little weird.

I have always used butter; given the choice between flavor and texture, I will pick flavor every time. But then I ran across an idea put forth by Julia Child and Ina Garten and, I'm sure, grandmothers everywhere: using a mixture of vegetable shortening and butter.

It was a revelation. I can't imagine why I'd never thought of it before.

I used Ms. Garten's recipe, which calls for a little more than twice as much butter as shortening. It was the best crust I'd ever made. It may be the best crust I've ever eaten — buttery and flaky and oh so good.

And now, if I may, I'd like to make a confession. Although I love pie more than perhaps any other food in the world, except doughnuts, there is only one kind of pie I do not like: apple.

I'm the guy who likes rhubarb pie. I'm the guy who likes gooseberry pie. I'm the guy who likes mincemeat pie. I like every conceivable type of pie in the world, except apple.

And yet, I thought it was my patriotic duty this year to make apple pie. And I'm glad I did because, like the crust I baked it in, it was the best apple pie I'd ever had.

Apple Pie

Yield: 8 servings

I used a recipe for the filling from the King Arthur Flour people precisely because it used two ingredients that I had not even thought of for apple pie, but they turned out to make all the difference — vanilla extract and apple juice concentrate.

The vanilla gives the filling a depth, a rich note that both complements the apples and keeps the spices from running away with the flavor. And the apple juice concentrate (it's just frozen apple juice that has been thawed) gives the filling a needed punch that makes it taste more like apples.

With the addition of the vanilla and the apple juice concentrate, you know you are eating an apple pie. Even those of us who ordinarily do not like apple pie will help themselves to another slice. I certainly did.

American Flag Pie

Yield: 8 to 10 servings

The American Flag Pie is a berry pie, which I love, but the way it looks is easily as important as the way it tastes. There are several versions of the pie roaming wildly throughout the internet, so I chose the one that looked the best.

The recipe comes from Sally's Baking Addiction, a food blog that has at least spawned a few cookbooks. It calls for the simplest possible strawberry and blueberry fillings; the only hard part is cutting the stars out of the crust. And even that isn't hard if you have a small star-shaped cookie cutter.

I do not have a small star-shaped cookie cutter. But I just cut a small star out of cardboard and used that as a template to make my stars.

It turned out great. It looked patriotic. And if you feel a little hesitant to eat a pie in the representative form of a flag, just remember it is a British thing and dig in.

The Link Lonk


July 01, 2020 at 06:16PM
https://ift.tt/2Ajlvbe

Bake a pie for the Fourth of July - STLtoday.com

https://ift.tt/2CPpHAw
Pie

Easy as (cream) pie: With a few kitchen staples, even a novice baker can create a celebratory dessert - Atlanta Journal Constitution

arome.indah.link

As pandemic fears and political turmoil continue to grip the country, it’s easy to forget there’s a major holiday coming up this weekend. With some pools closed, many community fireworks displays canceled, and beach vacations on hold, it’s up to us to figure out how we’re going to celebrate the Fourth of July.

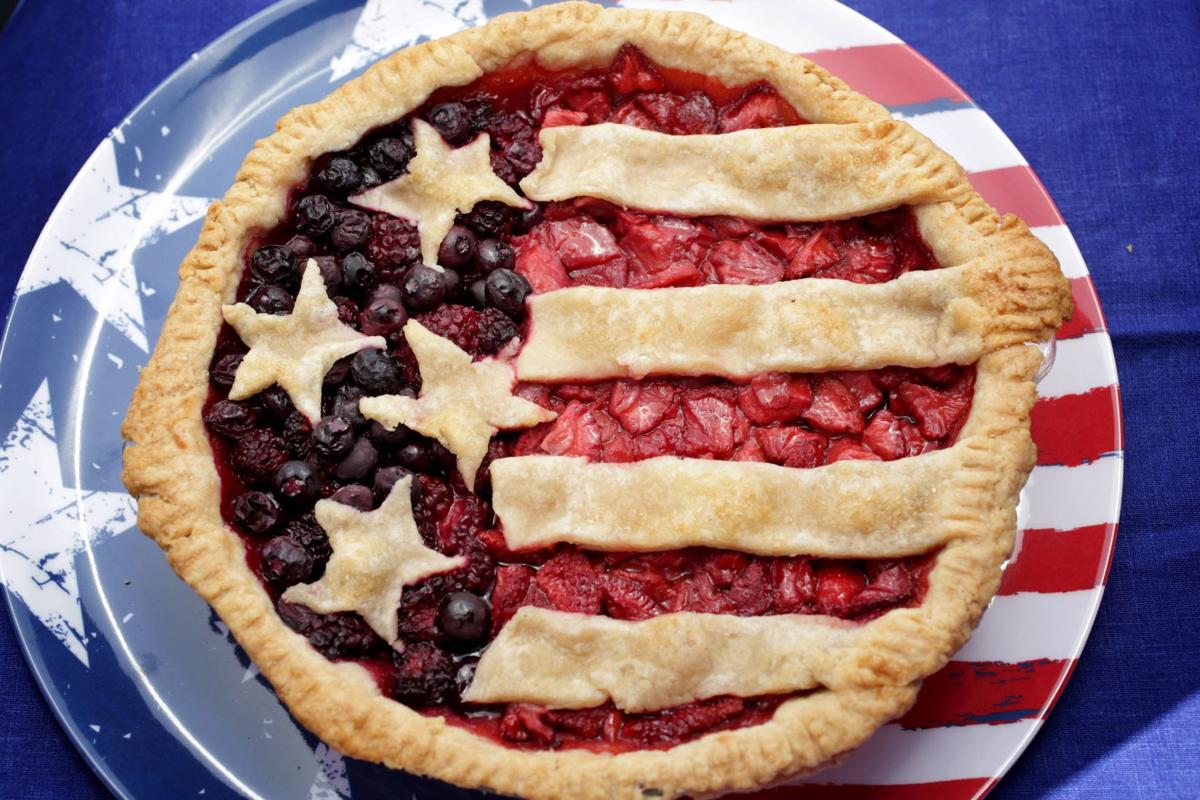
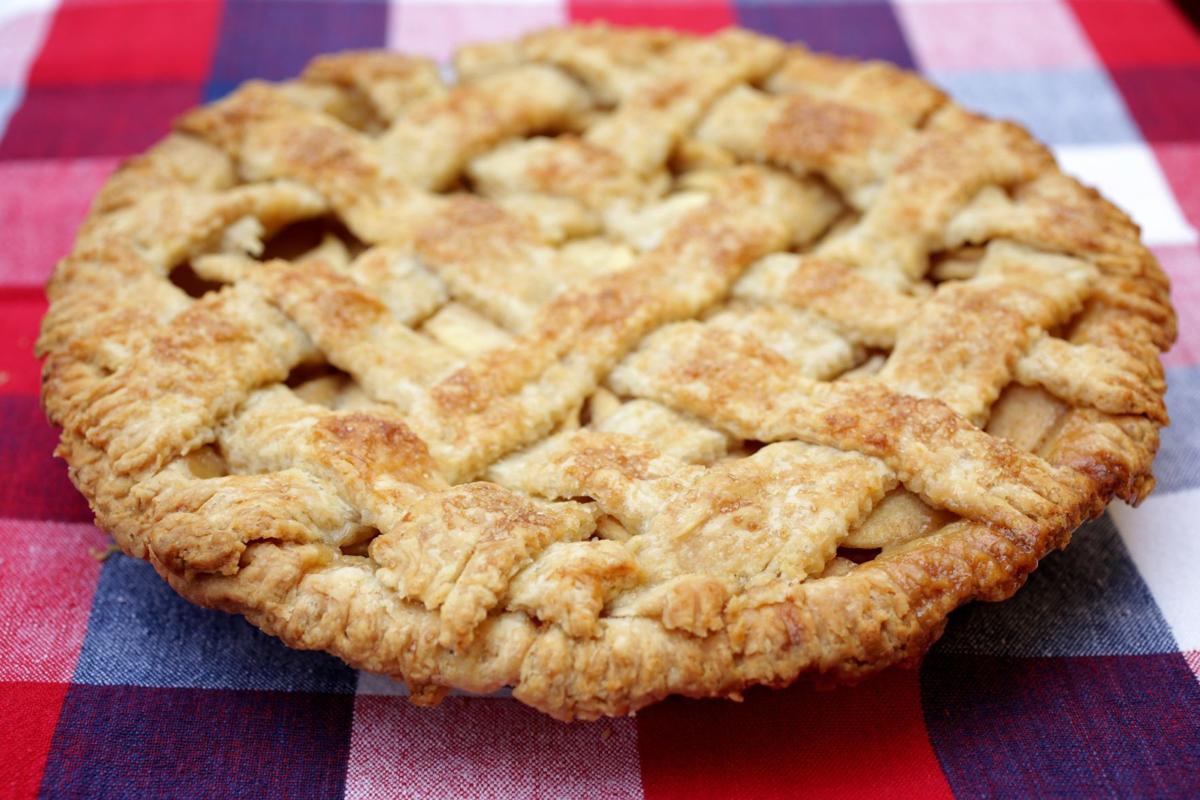
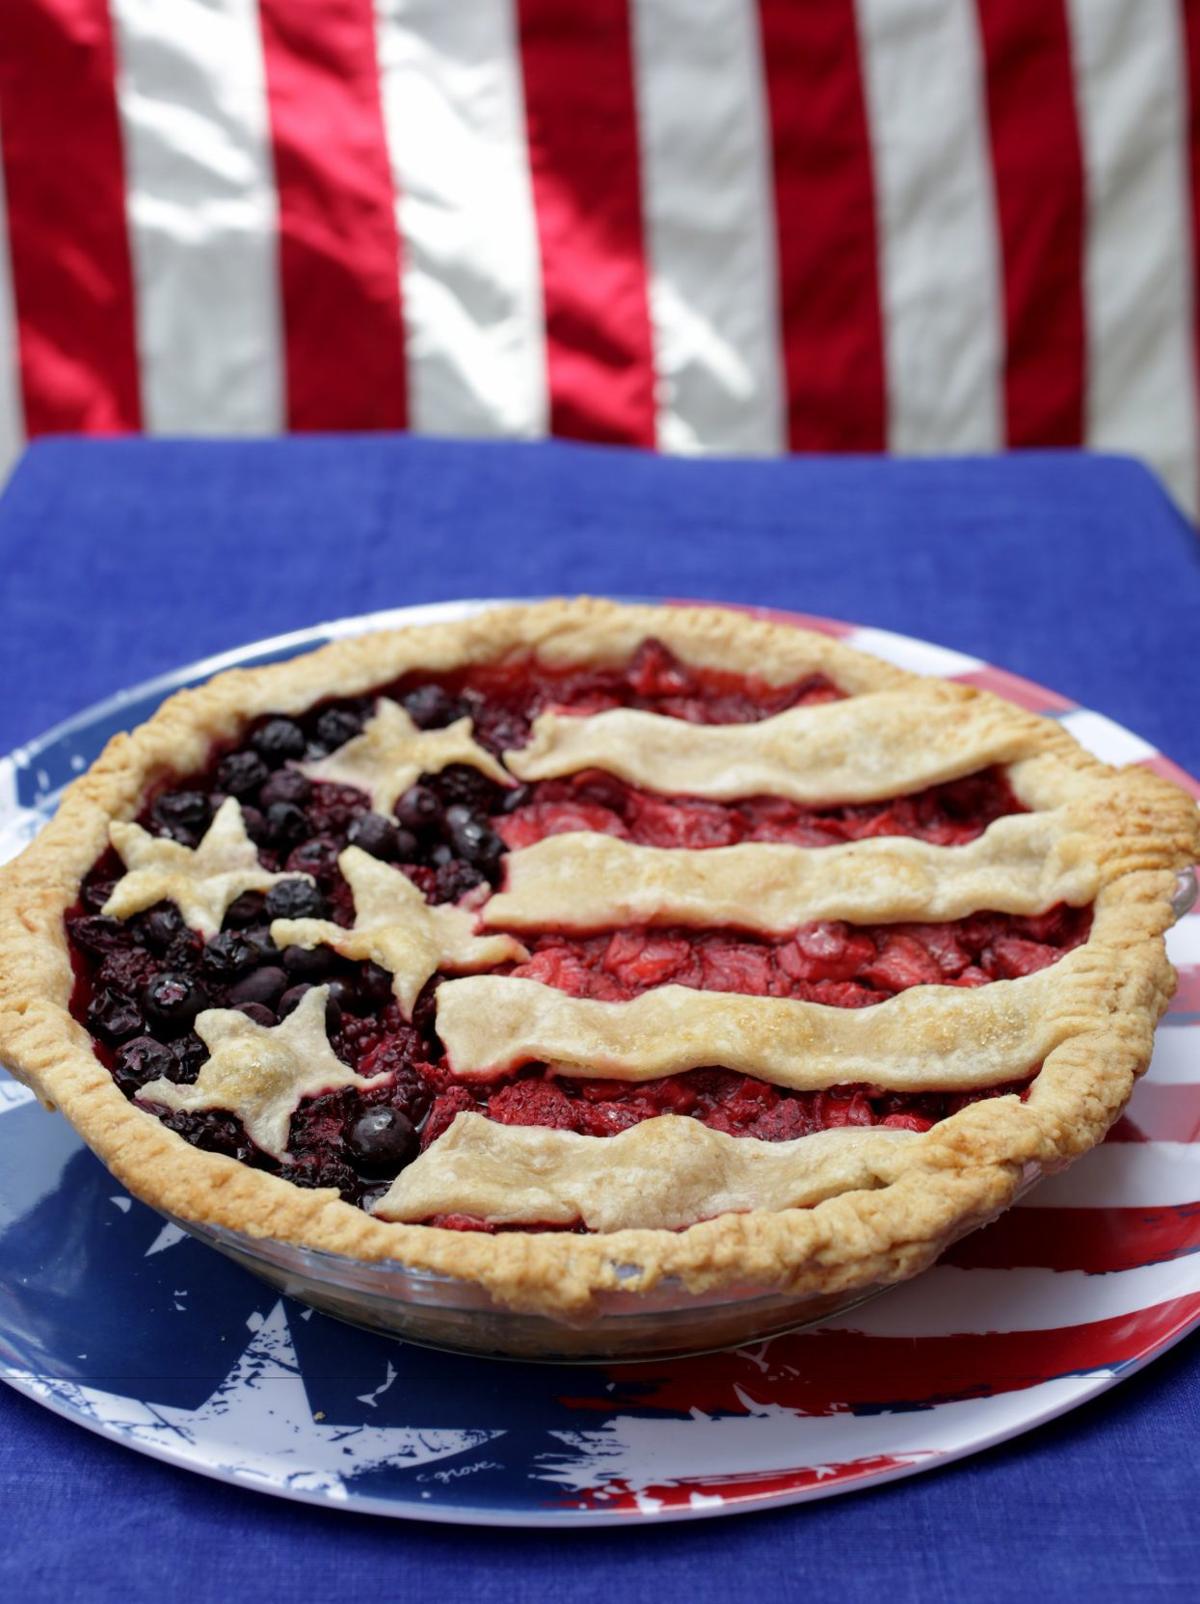
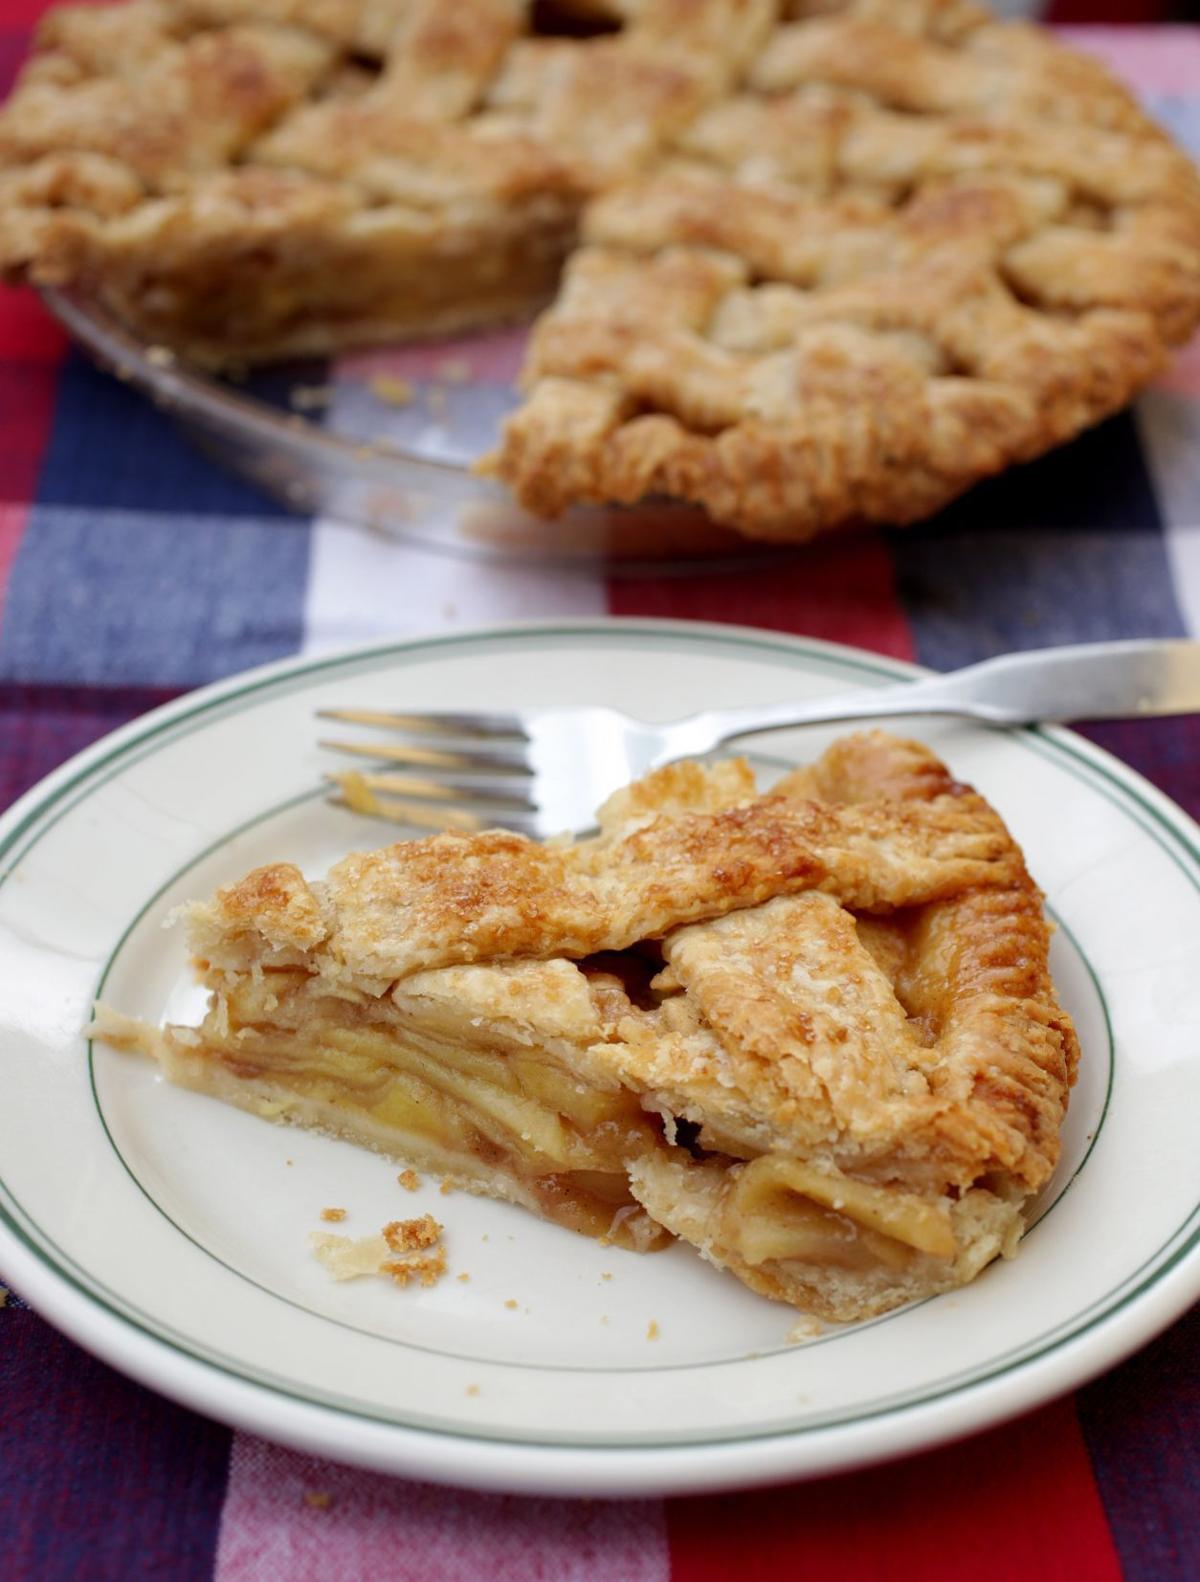
Whatever your plans, here’s one easy way to make the day, or any other day for that matter, feel festive: make a pie. Something luxurious-tasting and out of the ordinary that won’t break the budget. No specialized tools or exemplary baking skills required. Just enough creativity involved to produce a sense of accomplishment, without a big mess to clean up afterward.

I wondered what Chris Taylor and Paul Arguin might come up with if I threw down this challenge. The married Atlanta doctors have racked up more than 500 trophies and ribbons on the amateur baking competition circuit for their eye-popping, tradition-defying creations, including one for Best of Show in the 2017 National Pie Championships. Their first cookbook, “The New Pie: Modern Techniques for the Classic American Dessert” (Clarkson Potter, $30), was a finalist in this year’s International Association of Culinary Professionals Cookbook Awards competition.

I’ve been following their seductive Instagram feed (@floursugarbutter) ever since I made their Thai Iced Tea Pie topped with frozen Whipped Cream “Ice Cubes” when I reviewed their book last year, which may be one of the most impressive desserts to ever come out of my kitchen.

“We’re constantly on the lookout for new pie filling ideas, and most start with a master recipe of some kind,” says Taylor, an Alzheimer’s specialist at the Centers for Disease Control and Prevention, where Arguin also worked as an epidemiologist until his recent retirement. “We love the aromatic Thai tea with a float of sweetened condensed milk served over ice at our favorite Thai restaurants, and this creamy base was a perfect match for those flavors.”

With a few simple adjustments, Taylor and Arguin demonstrate how that same pudding-like filling can morph into unlimited variations that are just as decadent, but far less time-consuming.

Sweetened condensed milk is the key ingredient. “At its core, it’s milk and sugar that’s cooked and thickened during the manufacturing process,” explains Taylor. “It’s very convenient to have on hand because it’s shelf-stable and the sugar is already dissolved. You get the dairy, the sweetness, and the mouthfeel all at once.”

The other essential ingredients — cornstarch, egg yolks, salt, and any of a variety of liquids — are probably already in your pantry or refrigerator. Swap the homemade pie dough for a crumb crust to simplify. Or skip the crust altogether. Taylor and Arguin use a martini glass, for instance, for a take on a Cosmopolitan infused with cranberry juice and vodka.

“Any type of glasses could be used for the base,” Arguin adds. “A tea-flavored cream like the Earl Grey Latte can be poured into teacups and served in saucers. And instead of whipped cream, these pies could be topped with meringue, a layer of toasted nuts, chocolate shavings or even nothing at all.”

And if you really want to tap into your inner artist, pull out the pastry bag and practice your piping technique using the detailed instructions in “The New Pie,” or by watching a YouTube video.

Who needs fireworks?

RECIPES

Basic Cream Pie Master Recipe

This master pie recipe includes three parts: the crust or base; a filling made from a primary addition (a juice, sauce or other liquid), a basic cream pie filling (cornstarch, sweetened condensed milk, egg yolks, salt and butter), and a secondary addition (chopped chocolate, vanilla, a liqueur); and a topping.

Sweetened condensed milk provides the sweetness, dairy-richness, and silky mouthfeel in this simple, versatile stovetop custard that’s ready in minutes. Other liquids for the filling may be substituted than the ones suggested, but the other ingredients may need a little tinkering. “For very acidic liquids, we would recommend using a Key lime pie-type base or a lemon meringue pie filling base and baking it,” says Chris Taylor. More neutral liquids work best in this pudding-like filling.

THE CRUST OR BASE

THE PRIMARY ADDITION (see options)

3 tablespoons cornstarch

1 (14-ounce) can sweetened condensed milk

3 large egg yolks

Pinch of salt

2 tablespoons unsalted butter

THE SECONDARY ADDITION (see options)

THE TOPPING (see options)

Prepare the 9-inch pie crust of your choice (recipes follow) or set out 6-8 martini glasses, cups or small bowls.

Make the filling: In a medium saucepan, whisk THE PRIMARY ADDITION and cornstarch together until completely dissolved. Whisk in the sweetened condensed milk, yolks and salt.

Over medium heat, bring the mixture to a boil while gently whisking constantly, taking care that it doesn’t scorch.

Once the liquid starts to boil and bubbles appear all over the surface, set a timer for 1 full minute and whisk vigorously to prevent clumps.

Remove the saucepan from the heat and whisk in the butter and THE SECONDARY ADDITION. Once all of the ingredients have melted and the mixture is smooth and uniform, use a rubber spatula to strain the filling through a fine mesh sieve to remove any stray bits of cooked egg or keep it simple and pour the filling into THE CRUST or OTHER BASE and smooth the top.

Press plastic wrap directly onto the top of the mixture and refrigerate until cold and firm throughout, at least 2 hours.

Put THE TOPPING on the pie before serving.

Makes 1 (9-inch) pie, 6-8 servings.

CREAM PIE VARIATIONS

Cosmopolitan Cream Pies, Served Up

For a more grown-up tasting dessert, a well-stocked liquor cabinet is a good place to look for inspiration. You can serve it in a pie crust if you like, or just pour it directly into a cocktail glass, top with whipped cream, and perhaps garnish with a cookie if you crave some crunch.

THE BASE: 6-8 (4-ounce) martini glasses

BASIC CREAM PIE FILLING (see Basic Cream Pie recipe)

THE PRIMARY ADDITION: 1 cup 100% cranberry juice plus 1/4 cup orange juice

THE SECONDARY ADDITION: 2 tablespoons vodka

THE TOPPING: Grand Marnier Whipped Cream (see Basic Whipped Cream and variations)

Set out the martini glasses and ingredients for the Basic Cream Pie Filling, the cranberry juice, the orange juice, and the vodka.

Make the filling: In a medium saucepan, whisk the juices and cornstarch together until completely dissolved, then follow the Basic Cream Pie master recipe as directed. After removing the saucepan from the heat and whisking in the butter, add the vodka. Divide the custard among the martini glasses and refrigerate until cold and firm throughout, at least 2 hours. Make the Grand Marnier Whipped Cream (see recipe) and top each custard before serving.

Serves 6-8.

Per serving, based on 8: 357 calories (percent of calories from fat, 50), 6 grams protein, 39 grams carbohydrates, trace fiber, 20 grams fat (12 grams saturated), 127 milligrams cholesterol, 94 milligrams sodium.

Deep Dark Mocha Cream Pie

Here’s a pie for chocolate lovers with a serious caffeine jolt.

THE BASE: Chocolate Cookie Crust, baked and cooled (see recipe for Basic Crumb Crust with variations)

BASIC CREAM PIE FILLING (see Basic Cream Pie recipe)

THE PRIMARY ADDITION: 1 1/3 cups very strong coffee

THE SECONDARY ADDITION: 4 ounces bittersweet dark chocolate, chopped

THE TOPPING: Espresso Whipped Cream (see Basic Whipped Cream and variations)

Bake the Chocolate Cookie Crust according to instructions; let cool (see recipe for Basic Crumb Crust with variations).

Make the filling: In a medium saucepan, whisk the coffee and cornstarch together until completely dissolved, then follow the Basic Cream Pie master recipe as directed. After removing the saucepan from the heat and whisking in the butter, add the chocolate. Pour the custard into the cooled pie crust. Press plastic wrap directly onto the top of the mixture and refrigerate until cold and firm throughout, at least 2 hours.

Make the Espresso Whipped Cream and top the pie before serving.

Serves 6-8.

Per serving, based on 8: 586 calories (percent of calories from fat, 52), 8 grams protein, 64 grams carbohydrates, 2 grams fiber, 34 grams fat (19 grams saturated), 140 milligrams cholesterol, 247 milligrams sodium.

Earl Grey Latte Pie

Make sure to use extra-strong tea for this one, Taylor and Arguin advise: 4 tea bags for 2 cups of water (allowing for some evaporation). For a clever presentation, pour the custard into tea cups and serve on saucers. If you still want a crust, press the crumbs into the inside of the cups — no need to bake.

THE BASE: Graham Cracker Crust, baked and cooled

BASIC CREAM PIE FILLING (see Basic Cream Pie recipe)

THE PRIMARY ADDITION: 1 1/2 cups strongly brewed Earl Grey Tea

THE SECONDARY ADDITION: 1 1/2 teaspoons vanilla extract

THE TOPPING: Vanilla Whipped Cream

Bake the Graham Cracker Crust according to instructions; let cool (see recipe for Basic Crumb Crust with variations).

Make the filling: In a medium saucepan, whisk the tea and cornstarch together until completely dissolved, then follow the Basic Cream Pie master recipe as directed. After removing the saucepan from the heat and whisking in the butter, add the vanilla extract. Pour the custard into the cooled pie crust. Press plastic wrap directly onto the top of the mixture and refrigerate until cold and firm throughout, at least 2 hours.

Make the Vanilla Whipped Cream and top the pie before serving.

Serves 6-8.

Per serving, based on 8: 493 calories (percent of calories from fat, 52), 7 grams protein, 52 grams carbohydrates, 1 gram fiber, 29 grams fat (17 grams saturated), 146 milligrams cholesterol, 196 milligrams sodium.

Jelly Doughnut Cream Pie

Nutmeg and vanilla add a doughnut flavor to this dairy-rich filling that contrasts well with the tart-sweet preserves.

THE BASE: Animal Cracker Crust, baked and cooled

BASIC CREAM PIE FILLING (see Basic Cream Pie recipe)

THE PRIMARY ADDITION: 1 1/2 cups milk plus 1/2 teaspoon ground nutmeg

THE SECONDARY ADDITION: 1 1/2 teaspoons vanilla extract

THE TOPPING: 1/4 cup raspberry jam or preserves, preferably seedless

Bake Animal Cracker Crust according to instructions; let cool (see recipe for Basic Crumb Crust with variations).

Make the filling: In a medium saucepan, whisk the milk, nutmeg and cornstarch together until completely dissolved, then follow the Basic Cream Pie master recipe as directed. After removing the saucepan from the heat and whisking in the butter, add the vanilla extract. Pour the custard into the cooled pie crust. Press plastic wrap directly onto the top of the mixture and refrigerate until cold and firm throughout, at least 2 hours.

Spread the top with jam or preserves before serving.

Serves 6-8.

Per serving, based on 8: 439 calories (percent of calories from fat, 40), 8 grams protein, 58 grams carbohydrates, trace fiber, 20 grams fat (11 grams saturated), 116 milligrams cholesterol, 232 milligrams sodium.

Salted Caramel Cream Pie

A sprinkling of flaky Maldon salt transforms a filling built on supermarket caramel ice cream topping into a sophisticated delight. The cracker crust intensifies that irresistible salty-sweet flavor combo. Any of the other crumb crusts would work just as well.

THE BASE: Saltine Cracker Crust, baked and cooled

BASIC CREAM PIE FILLING (see Basic Cream Pie recipe)

THE PRIMARY ADDITION: 3/4 cup Smucker’s Caramel Sauce (from 1 12-ounce jar) plus 3/4 cup whole milk

THE SECONDARY ADDITION: 1 1/2 teaspoons vanilla extract

THE TOPPING: Maldon flaked salt or other large flaky salt, for sprinkling

Bake Saltine Crust according to instructions; let cool (see recipe for Basic Crumb Crust with variations).

Make the filling: In a medium saucepan, whisk the caramel sauce, milk and cornstarch together until completely dissolved, then follow the Basic Cream Pie master recipe as directed. After removing the saucepan from the heat and whisking in the butter, add the vanilla extract. Pour the custard into the cooled pie crust. Press plastic wrap directly onto the top of the mixture and refrigerate until cold and firm throughout, at least 2 hours.

Top with flaked salt before serving.

Serves 6-8.

Per serving, based on 8: 487 calories (percent of calories from fat, 41), 8 grams protein, 65 grams carbohydrates, 1 gram fiber, 23 grams fat (13 grams saturated), 126 milligrams cholesterol, 475 milligrams sodium.

Basic Crumb Crust with Variations

“We’ve had success using many different types of crumbs including crackers, cookies and even breakfast cereals to make crumb crusts,” says Chris Taylor. “If the fat content of the cookie you want to try (according to the nutrition label) is similar in weight to that of graham crackers, it usually works. Feel free to experiment, but depending on the cookie you are using, sometimes the butter and sugar need to be adjusted. A cookie or cracker with a higher fat content will usually require less butter to properly bake.”

Cookie or cracker crumbs

Sugar

Pinch of salt

Unsalted butter, melted and still warm

Place the cookies or crackers into a gallon-sized zip-close bag. Seal the bag and use a rolling pin to crush the cookies/crackers into fine crumbs. Transfer the crumbs to a medium bowl. Stir in the sugar and salt followed by the melted butter. (Alternatively, you can process the cookies/crackers to crumbs in the bowl of a food processor then pulse in the sugar, salt and melted butter to incorporate.)

Press the crumbs evenly on the bottom and sides of a 9-inch pie plate. Place the crust in the freezer while heating the oven to 350 degrees. Bake the crust for 10 minutes. Place it on a rack to cool completely before adding the pie filling.

Graham Cracker Crust

5.5 ounces graham crackers (approximately 10 whole rectangular sheets)

2 tablespoons sugar

5 tablespoons unsalted butter, melted and still warm

Follow the instructions for the Basic Crumb Crust. Makes 1 (9-inch) pie crust.

Chocolate Cookie Crust

20 chocolate sandwich cookies, such as Oreos (no additional sugar is needed)

3 tablespoons butter, melted and still warm

Follow the instructions for the Basic Crumb Crust. Makes 1 (9-inch) pie crust.

Animal Cracker Crust

5.5 ounces animal crackers (we tested this recipe with Barnum’s Animal Crackers)

3 tablespoons sugar

5 tablespoons butter, melted and still warm

Follow the instructions for the Basic Crumb Crust. Makes 1 (9-inch) pie crust.

Saltine Cracker Crust

5 ounces saltine crackers

2 tablespoons sugar

8 tablespoons butter, melted and still warm

Follow the instructions for the Basic Crumb Crust. Makes 1 (9-inch) pie crust.

Basic Whipped Cream with Variations

1 cup cold heavy cream

2 tablespoons sugar

THE FLAVORING (see options)

In a medium bowl, use an electric mixer on medium speed to beat the heavy cream, sugar and THE FLAVORING until the mixture holds stiff peaks. This means that when the beaters are pulled from the bowl, the whipped cream keeps a pointy peak that doesn’t flop over. If the peak flops over, beat for 15 more seconds and test again. Spread over the top of the pie or dollop on individual slices.

Makes 2 cups whipped cream.

The flavoring options:

Vanilla Whipped Cream: Add 1/2 teaspoon vanilla extract.

Grand Marnier Whipped Cream: Add 1 teaspoon Grand Marnier or other orange liqueur such as Cointreau or Triple Sec.

Espresso Whipped Cream: Add 1/2 teaspoon instant espresso powder or instant coffee.

Support real journalism. Support local journalism. Subscribe to The Atlanta Journal-Constitution today. See offers.

Your subscription to the Atlanta Journal-Constitution funds in-depth reporting and investigations that keep you informed. Thank you for supporting real journalism.

Download the new AJC app. More local news, more breaking news and in-depth journalism.
AJC.com. Atlanta. News. Now.

Download the new AJC app. More local news, more breaking news and in-depth journalism.
AJC.com. Atlanta. News. Now.

With the largest team in the state, the AJC reports what’s really going on with your tax dollars and your elected officials. Subscribe today. Visit the AJC's Georgia Navigator for the latest in Georgia politics.

Your subscription to The Atlanta Journal-Constitution funds in-depth reporting and investigations that keep you informed. Thank you for supporting real journalism. Visit the AJC's Georgia Navigator for the latest in Georgia politics.

The Link Lonk


July 01, 2020 at 08:21AM
https://ift.tt/3ggYi8S

Easy as (cream) pie: With a few kitchen staples, even a novice baker can create a celebratory dessert - Atlanta Journal Constitution

https://ift.tt/2CPpHAw
Pie

3D Printed Vegan Steak Coming to Market in 2021 - VegNews

arome.indah.link

Israel-based startup Redfine Meat will launch its first product, Alt-Steak, at high-end restaurants later this year before expanding to market distribution in 2021. The new product is made with the company’s revolutionary 3D technology that maps 70 sensorial parameters to create a cut of vegan meat that mimics the taste, texture, and juiciness of a beef steak. Redefine Meat created individual plant-based components, Alt-Muscle, Alt-Fat, and Alt-Blood, that its industrial 3D printer turns into Alt-Steak.

“The importance of using precision 3D-printing technology to achieve texture, color, and flavor—and the combinations between them—cannot be overstated,” Eshchar Ben-Shitrit, CEO and co-founder of Redefine Meat, said. “By using separate formulations for muscle, fat, and blood, we can focus on each individual aspect of creating the perfect Alt-Steak product. This is unique to our 3D-printing technology and lets us achieve unprecedented control of what happens inside the matrix of alt-meat.” 

In 2019, the company completed a $6 million seed funding round led by CPT Capital, Hanaco Ventures, PHW Group (Germany’s largest poultry company), and Israeli angel investors and used the funding to finalize the development of its revolutionary alternative-meat 3D printer. The company worked with Swiss flavor manufacturer Givudian and restaurant industry professionals to refine the formulation of Alt-Steak. 

“Since day one of the company, we have been working on creating a tasty and affordable plant-based alternative to steaks, one of the most cherished food products and the driver of the entire meat industry,” Ben-Shitrit said. “Today’s announcement marks the start of a new era in alternative meat—the Alt-Steak era—driven by production processes that will accelerate the development of a wide range of alt-meat whole muscle products and create a sustainable alternative to raising and eating animals.”

Please support independent vegan media and get the very best in news, recipes, travel, beauty, products, and more.
Subscribe now to the world’s #1 plant-based magazine!

Subscribe
The Link Lonk


July 01, 2020 at 05:59PM
https://ift.tt/38gaofM

3D Printed Vegan Steak Coming to Market in 2021 - VegNews

https://ift.tt/38fhwJ2
Steak

Sizzling steak favorites to celebrate the 4th - WXOW.com

arome.indah.link

LA CROSSE, Wis. (WXOW) - The heat is on this weekend as many backyard chefs will be firing up the grill. For those who want to "grill like you mean it" Angie Horkan from the Wisconsin Beef Council provides some revolutionary recipes.

Red, White and Beef Salad

Ingredients

  • 1 beef Top Round Steak, cut 1 inch thick (about 1-1/2 pounds)
  • 1 cup prepared salsa
  • 8 cups chopped iceberg lettuce or pre-packaged iceberg lettuce mix
  • 1 can (15 ounces) black beans, rinsed, drained
  • 1 cup frozen corn, thawed
  • 1/3 cup prepared ranch dressing
  • 1/3 cup prepared salsa
  • 1 cup broken tortilla chips (optional)

Cooking

  1. Place beef Top Round Steak and 1 cup salsa in food-safe plastic bag; turn steak to coat. Close bag securely and marinate in refrigerator 6 hours or as long as overnight, turning occasionally.
  2. Remove steak from marinade; discard marinade. Place steak on grid over medium, ash-covered coals. Grill steak, covered, 12 to 14 minutes (over medium heat on preheated gas grill 16 to 19 minutes) for medium rare (145°F) doneness, turning occasionally. (Do not overcook.)
  3. Meanwhile, combine lettuce, beans and corn in shallow serving bowl; toss. Carve steak into thin slices; arrange on top of salad. Drizzle dressing and 1/3 cup salsa separately over beef. Sprinkle with chips, if desired.

Pesto Steak & Arugula Pizza

Ingredients

  • 1 beef Top Sirloin Steak boneless, cut 1 inch thick (1 pound)
  • 2 tablespoons basil pesto
  • 2 tablespoons fresh lemon juice
  • 1 refrigerated whole grain, whole wheat or regular pizza dough (about 1 pound)
  • Nonstick cooking spray
  • 1 cup yellow and/or red cherry or grape tomatoes, halved or quartered if large
  • 1/2 cup reduced-fat shredded Italian blend cheese
  • Salt
  • 1 cup arugula or baby spinach leaves
  • 1/8 to 1/4 teaspoon crushed red pepper (optional)

Cooking

  1. Combine pesto and lemon juice in small bowl. Evenly brush beef steak with 1 tablespoon pesto mixture.
  2. Place steaks on grid over medium, ash-covered coals. Grill, covered, 11 to 15 minutes (over medium heat on preheated gas grill, 13 to 16 minutes) for medium rare (145°F) to medium (160°F) doneness, turning occasionally.
  3. Meanwhile, preheat oven to 425°F. Spray 10 x 15-inch rimmed baking sheet with cooking spray. Place dough on baking sheet and pat dough to edges of baking sheet. Spread dough with remaining 3 tablespoons pesto mixture. Top with tomatoes and cheese. Bake in 425°F oven, 15 to 18 minutes or until crust is golden brown.
  4. Carve steak into slices; season with salt, if desired. Top pizza evenly with arugula and steak slices; sprinkle with red pepper, as desired.
The Link Lonk


July 01, 2020 at 04:56PM
https://ift.tt/2ZqLhTp

Sizzling steak favorites to celebrate the 4th - WXOW.com

https://ift.tt/38fhwJ2
Steak

Tuesday, June 30, 2020

Save that pasta water. It’s the key to this creamy goat cheese sauce. - The Washington Post

arome.indah.link

Overview

A big bowl of warm pasta often was my go-to on weeknights when I didn’t feel like cooking. I’d boil it, toss it with olive oil, assorted dried herbs and grated Parmesan, and dig in.

Then, I discovered how with just the tiniest bit more effort, I could go from a satisfying bowl of pasta to a dish with deeper flavor and a luxurious texture. The key was adding cheese to piping hot, starchy pasta water and giving it a vigorous stir.

These days, almost every time I boil pasta, I retain the murky water and add a ladle full as a thickener, giving body and a bit of flavor to a variety of sauces, gravies — even soups.

Two extremely simple examples of this technique that we’ve published here recently include Ali Slagle’s Lemon-Butter Pasta and Yasmin Fahr’s take on Pasta Alla Gricia, both of which feature an emulsion of Parmesan and starchy pasta water into a creamy sauce.

Scale and get a printer-friendly version of the recipe here.

For the emulsion to work, the pasta water should be piping hot and one should be prepared to add the cheese to the water and quickly stir until the creamy sauce emerges.

Some cooks retain the pasta water by lifting the noodles out of the pot with tongs. I prefer to place the colander over large measuring cup and pour the pot over, catching the starchy liquid in the container below. I then add the water back to the pot and reheat, if necessary.

One rookie mistake to avoid: Remember, if you salted or seasoned the water before you boiled your pasta, you are adding that salt or seasoning to your sauce as well, so adjust as needed.

Until now, I had used the technique with hard cheeses such as Parmesan and Romano. Recently, I tried it with goat cheese, and now I have a new favorite.

Here, I added garlic, dried oregano and cayenne to the sauce pan with chunks of goat cheese and hot pasta water. Unlike with hard grated cheeses that require brisk stirring, this preparation calls for a more gentle mixing. As you stir, the goat cheese will melt into the hot water, creating a thin sauce that is then tossed with herbs, spinach and, finally, pasta.

The sauce coats each pasta strand, spreading the tangy goat cheese flavor through the dish. Sub in your favorite vegetables, herbs and toppings as desired.

I added walnuts and crisped bacon to bring a little texture to the creamy bowl.


Ingredients

Kosher salt

1 pound whole-grain spaghetti or thin spaghetti (spaghettini)

2 teaspoons avocado oil or extra-virgin olive oil

2 cloves garlic, grated or minced

8 ounces fresh goat cheese

1/2 teaspoon dried oregano

1/4 teaspoon cayenne pepper

10 ounces fresh baby spinach

1 cup (about 1 ounce) fresh flat-leaf parsley leaves and tender stems, chopped, plus more for garnish

1/2 cup chopped walnuts, toasted if desired

3 strips crisp bacon, roughly chopped (optional)


Steps

Step 1

In a large pot of salted boiling water over medium-high heat, cook the pasta about 2 minutes short of package instructions. Drain, reserving 4 cups of the pasta water.

Carefully wipe out any residual water from the pot and return it to medium-high heat. Add the oil and heat until shimmering. Add the garlic and cook, stirring, until fragrant, about 1 minute.

Step 2

If the goat cheese is in a log, cut it into about 6 pieces. Add the goat cheese, oregano and cayenne and 2 cups pasta water and stir until the cheese is melted and well combined, about 4 minutes. Reduce the heat to medium. Add the spinach and parsley and cook, stirring occasionally, until the spinach is just wilted, 2 to 3 minutes, adding splashes of additional pasta water as needed.

Step 3

Remove the pot from the heat and add half of the cooked pasta. Using a large fork or tongs, toss until the noodles are well coated.

Add the remaining pasta and repeat until all of the pasta is coated in a thin sauce. Add additional pasta water if the noodles seem too dry.

Step 4

Transfer the pasta to a big serving bowl. Sprinkle it with the walnuts and bacon, if using. Gently toss once more and serve family-style. Sprinkle parsley on top.

From recipes editor Ann Maloney.

Tested by Ann Maloney; email questions to voraciously@washpost.com.

Scale and get a printer-friendly version of the recipe here.

Did you make this recipe? Take a photo and tag us on Instagram with #eatvoraciously.

Browse our Recipe Finder for more than 9,000 Post-tested recipes at washingtonpost.com/recipes.

Check out summer grilling recipes from Voraciously:

A vibrant marinade makes this jerk chicken stand out from the grilling crowd

Fire up the grill for these 9 chicken recipes, including barbecue, jerk and bang bang

A dry marinade and two-zone grill are the one-two punch of great grilling

Nutrition

Calories: 742; Total Fat: 34 g; Saturated Fat: 11 g; Cholesterol: 33 mg; Sodium: 405 mg; Carbohydrates: 77 g; Dietary Fiber: 15 g; Sugars: 3 g; Protein: 31 g.

The Link Lonk


July 01, 2020 at 01:07AM
https://ift.tt/31rhDQK

Save that pasta water. It’s the key to this creamy goat cheese sauce. - The Washington Post

https://ift.tt/31oM9uv
Pasta

How to make pasta, according to a chef and Food Network consultant - Business Insider - Business Insider

arome.indah.link

When you buy through our links, we may earn money from our affiliate partners. Learn more.

kitchenaid pasta attachment
Sur La Table
  • Regardless of whether you're using a pasta machine or rolling your noodles out by hand, you can make your own pasta easily at home.
  • While most recipes call for semolina flour, our recipe requires all-purpose flour, which you probably have in your pantry at home. 
  • We spoke to Chef Dane Hiett, who shared with us his go-to pasta dough recipe, that you can use to roll out pasta by hand or on a machine.
  • Read more: The best KitchenAid stand mixers

Homemade pasta is one of those things that seem complicated to pull off. And with all that flour and egg, it can be easy to make a huge mess in your kitchen.

But whether you've been trying to recreate a delicious pasta dish from your favorite Italian restaurant, or were gifted a pasta-making attachment for your stand mixer, you may feel like the time is right to test the (heavily-salted) waters of DIY pasta. 

Truthfully, it's not all that hard to do. "It's not as complex as baking, but it does have a similar end result," says chef Dane Hiett, owner of Chef Dane's Kitchen, a full-service, luxury catering business in Colorado. He spent eight years with the Four Seasons Hotel in Santa Barbara, CA, and served as a consultant on the Food Network show Restaurant: Impossible

Since there is dough involved, you might think that pasta is as complicated as, let's say, bread. And while Hiett admits that making pasta is very precise, there is more room for adjustments along the way. "At the end of the day, I can see the pasta as I'm making it, and I can taste it and tweak it if needed," he says. 

There's also a ton of room for customization based on your preferences. "For example, you could use almond milk or milk instead of water," Hiett says. 

And while you could use the Italian nonna technique of making a well in a pile of flour and scrambling your eggs into it, Hiett's recipe is decidedly less fussy. "I make the whole thing in a Kitchenaid with a dough hook," he says. And if you then go on to use the pasta-making KitchenAid attachment, you could have perfectly-made pasta without making a huge mess. Check out our guides to the best KitchenAid mixers and attachments if you need a head-start on your pasta adventure.

Italy pasta salad viking
Viking

What to keep in mind before making pasta

Like with baking bread, there are a few things you want to keep top of mind. The most important thing is to ensure your dough isn't too wet, according to Hiett. "This will make it difficult to feed through the pasta machine," he says. "But that's an easy fix, where you rub it down with more flour and run it through again." Make sure you're using a light touch, though, because you don't want to go overboard and cause the pasta to cake. 

It's also super easy to make the pasta ahead of time and keep it in your fridge or freezer, Hiett says. For non-noodle shapes, just spread them evenly on a sheet pan, freeze them, and then store them in your freezer in a plastic bag. For noodles, you can take a handful and, using a fork, swirl them into little nests before following the same technique — freeze them on a sheet pan, and then store them in a plastic bag.

When it comes time to cook, you can drop them into boiling water straight from the freezer. Homemade pasta cooks a lot faster than dried pasta, so most shapes will be done in about 3-5 minutes. 

The following recipe that chef Hiett shares can be used with a pasta-making attachment or with a hand-rolling technique. It can also be used for pretty much every shape of pasta. If you're using your Kitchenaid, make sure to follow the directions for each pasta shape so that you're inserting the dough properly.

But if you're going by hand, you'll need a little more direction. Since there are so many shapes of pasta, it is impossible to lay out how to roll out each one by hand. This is a great video to watch for a majority of pasta shapes. 

Ahead, find one of the easiest pasta recipes you'll ever try.

How to make pasta 

Ingredients

What you'll need

Directions

  1. In a Kitchenaid stand mixer, add all ingredients to your bowl at once.
  2. Using the dough hook attachment, turn the mixer on to a low setting.
  3. As the ingredients come together, turn the mixer up to medium speed. If the dough is looking dry, add a splash or two of your liquid to make it more cohesive. 
  4. Once the dough begins to form into a ball and separate from sides, mix for an additional five minutes. 

Remove the bowl from the stand mixer. Cover the dough and let stand in the fridge for 30 minutes to cool. From here, you can either follow the directions on your pasta maker to roll the dough into sheets to feed through the machine or follow these directions to create different pasta shapes.

The Link Lonk


July 01, 2020 at 04:24AM
https://ift.tt/2VxSXlD

How to make pasta, according to a chef and Food Network consultant - Business Insider - Business Insider

https://ift.tt/31oM9uv
Pasta

Featured Post

Recipe: English Pea Pasta - Health Essentials from Cleveland Clinic

arome.indah.link There is something special about using fresh peas straight out of the pod. This recipe was inspired by our root-to-stem ph...

Popular Posts